-
By Jimmy Cass

- Published Jul 2, 2013 in Gear Garage
Your guitar is an investment. Keep in good shape with a few tricks and some regular maintenance. Keep it up and you'll have your favorite axe for years to come.
Your instrument is an extension of you, and rightfully should be treated as such. Regardless of which instrument you play, your investment into your musical endeavors requires periodic care and maintenance in order to prolong the instrument's lifespan and keep it in top playing condition.
An instrument of quality usually means that you've spent a considerable amount of hard-earned cash in order to bring your music alive. Even if your instrument is a $75 Craigslist special, you want that instrument to perform well for you, maintain or increase in its value, and provide years of music-making. However, this can prove to be tough when life gets in the way and you have to run to work, or you're getting rushed on and off the stage for the next band.
In this article, we will focus on guitars. However, the same principles may be applied to a variety of wooden instruments such as cellos and violins.
Do your due diligence.
Take the time to learn about your instrument. Knowing everything from the wood type to the hardware and pickups, to the finish is important. This will help you determine what to use to clean the instrument and care for it.
For example, a Gibson Les Paul often has a mahogany body with a maple top and rosewood fingerboard. They are typically finished in nitrocellulose lacquer, as are a majority of instruments from the 1920s, as opposed to a polyurethane finish which is usually used on lower-end instruments.
Nitrocellulose does not fully "cure" and may react to other chemicals. There are a ton of manufacturers who put out instrument cleaning products. However, for light jobs, a good furniture polish with lemon oil is usually okay to use.
Below is a good example of not performing due diligence. This Les Paul was in the process of being cleaned by one of our customers when he decided to take a can of compressed air to blow out the pick dust on the bridge. He didn't realize the finish was nitrocellulose, or what chemical the can of air contained, and the chemical reacted with the nitro finish, burning the instrument forever.
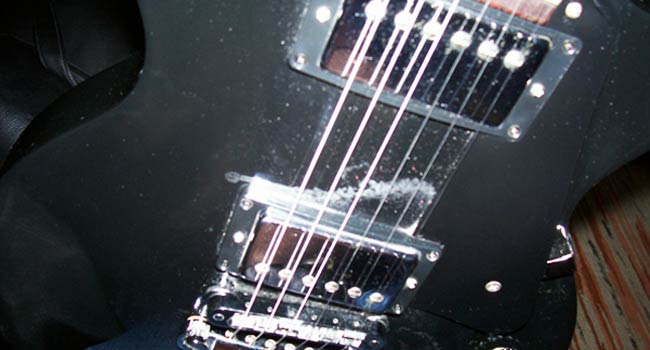
Know which chemicals you're dealing with or you could give your guitar a nasty chemical burn.
The daily shred.
When you play your instrument, it's a smart move to make sure your hands are clean before picking it up. Even so, your hands will still leave oil and residue on the instrument. Make a habit of keeping a soft, lint-free, dry cloth in your case and thoroughly wipe off the instrument where your skin has made contact—particularly the neck and strings.
I usually include the front, back and sides of the instrument as well. This will assist in keeping grease, dirt and grime from your skin building up on the instrument's surface over time. Heavy buildup eventually affects the neck, fingerboard and finish. Wiping down your instrument after every play will also assist in prolonging string life.
Just lean it on the wall by the heater.
That is a big NO! Try to avoid leaning your instrument against its neck, period. Invest in a hard case, gig bag, instrument stand and/or a wall hanger that locks the guitar in to avoid falling. Serious damage can occur if your instrument falls over. Gibson guitars, for example, are famous for their necks breaking around the headstock.
Avoid wearing a belt while playing standing up. This will help avoid "Belt Buckle Rash": scratches and dings on the back of your instrument where your buckle has come in contact while playing.
Also avoid exposing your instrument to excessive heat, cold, moisture and humidity. Wood expands and contracts with the climate. On high-end and vintage instruments that use hide glue, heat can be your worst enemy.
Keep in mind that hide glues soften when heated and glued parts will loosen. Humidity and moisture can cause the wood and/or the neck to warp with prolonged exposure. Keep your instrument in a case and out of the sun. A cool and dry climate is ideal.
The acoustic pictured below was left leaning against a wall next to a heater all winter. One day, the owner was watching TV when he heard a loud pop. He found the guitar's top had separated from the body due to excessive heat.
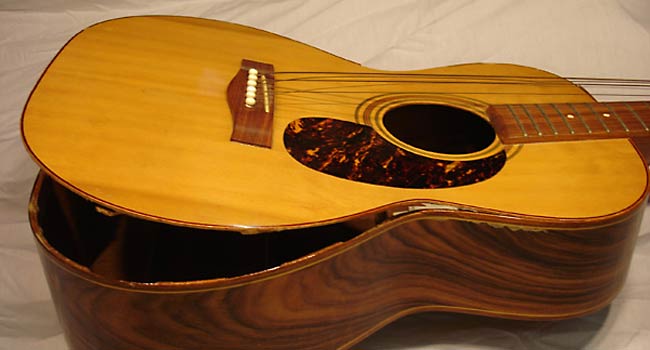
Never leave your acoustic guitar near a heat source. The heat loosens the glue which is when things to start to come apart at the seams.
Always allow a window of time when coming in from the heat or cold to remove the instrument from its case. Usually 5 - 10 minutes is sufficient for the instrument to adjust to its surroundings.
Keep it clean to help it scream.
Clean your instrument and change your strings on a regular basis. How long a set of strings will last depends on how you play.
Typically, people are told to change one string at a time to keep your current setup intact. By removing all the strings at once, on a Les Paul for example, you run the risk of throwing off the neck, bridge and saddle. My personal habit is, every third or fourth string change, I remove all of the strings and give the instrument a good going-over using some of the techniques below.
Keep in mind that doing this may require the guitar to be properly set up again. This includes a neck adjustment, bridge height, saddle height, and intonation. If you are not comfortable or aware of how to perform these techniques, take the instrument to a qualified professional. It's a good practice to have your instrument serviced at least once a year by a qualified professional.
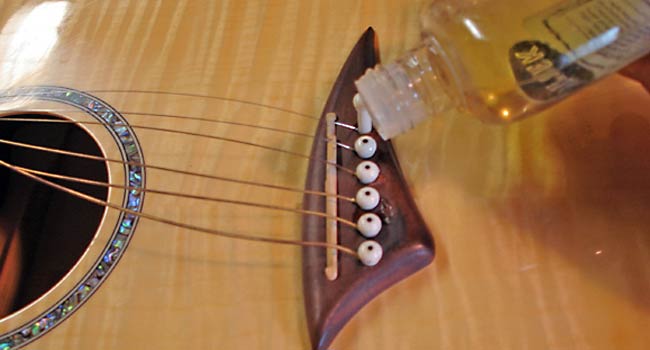
Quick Tip: Don't force bridge pins out if they seem stuck. A small drop of polish helps with removal.
Create the perfect workstation.
Put aside a clean piece of soft carpet remnant, maybe 3' x 4'. You can use this underneath your guitar on your workstation to prevent scratching the instrument. If you do not have a neck saddle, you can make one out of 2-3 pieces of shortcuts of 2x4. Screw them together to achieve the correct height and cover the top of the boards with an old folded up t-shirt or thick foam for cushioning. The neck should not come in contact with the wood blocks, and should be cushioned well to eliminate slippage.
You will want to have the following tools and supplies handy:
- Flat and phillips head screwdrivers in various sizes
- A set of deep sockets (standard and/or metric)
- A set of hex wrenches (if applicable)
- A string winder
- Clean, soft, lint-free cloths
- Steel wool
- Jewelry polishing cloth
- Soft, clean toothbrushes
- A soft, clean paintbrush
- Toothpicks
- A straight edge
Dealing with metal tarnish.
Keep your metal parts clean, and tarnish-free. Super-fine steel wool (0000 grade) does a wonderful job cleaning heavily tarnished fret wire and other metal parts. However, keep it away from your pickups. It is steel and the magnets will attract the metal dust that is created from the friction.
Before using steel wool on the fret wire, cover the body of the guitar to keep the steel shards from attaching to the pickups. Use doubled-up pieces of painter's tape (4 pieces all together, 2 per side on top of one another) on either side of the fret wire to ensure the steel wool does not scratch the fretboard. You can then polish the fret wire with the steel wool, peel off the tape, and move on to either side of the next fret easily.
Also, with the tape in place you can gently scrape off any underlying crust that has built up in the crevasses of each side of the fret wire that the steel wool may not have reached. A wooden toothpick is a good tool for this job, and keeping the painter's tape in place will help you to not scratch the fretboard. Use a clean paint brush or vacuum cleaner to clean up any residuals left behind from the steel wool before moving on.
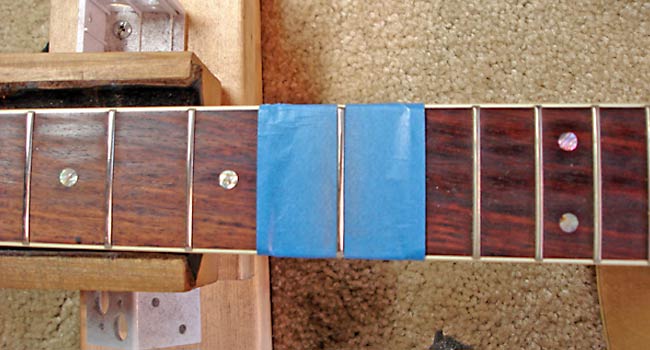
Painter’s tape helps keep your fret polishing job neat and clean.
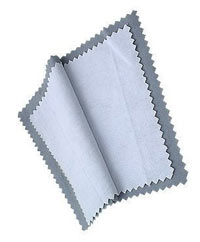 For lighter jobs, and/or to bypass the steel wool, invest in a jewelry cleaning cloth. These chemically treated cloths remove tarnish and put a quick shine on almost all finished metal. They are available for less than $10 from a variety of jewelry shops.
They are, however, chemically treated, so use painter's tape when working on the fretboard, and keep them off of your finish. I've never seen one of these cloths cause an adverse reaction if it comes in contact with the finish, but as with the Les Paul above, better to be safe than sorry.
Pick your poison.
Choose a recommended instrument care cleaner or furniture polish with lemon oil from your favorite company. Never apply anything directly to the instrument itself. Always apply to a soft, lint-free cloth and then to the instrument. Test whatever you decide to use on a small, out-of-sight spot, then go ahead and use on the rest of the instrument.
I like to follow up with a second soft, lint-free cloth that is dry, to wipe off any excess polish or cleaner. Once a year, give your neck an occasional healthy dose of lemon oil and let it sit for a few minutes for absorption. This will assist in keeping the wood from drying out. A used, soft, clean toothbrush also works well with the lemon oil to gently clean the fretboard and help get the dirt off. A second used soft (but clean) dry toothbrush will help remove the dust in those hard-to-reach places like under the bridge, in between saddles, and around pickups.
Keep it tight to make it right.
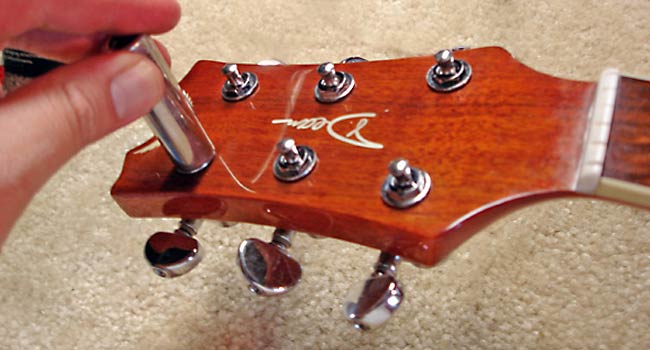
When performing your periodic maintenance, do a once-over to make sure that all screws and related hardware on your instrument are tight and in check. This will help avoid unwanted noise or buzzing. Perform the same check with your tuners. Some tuners have a tension screw, some have a screw in the middle of the tuner's gear into the string post, some have both. However, not all tuner gears are accessible. A loose tuner will result in trouble keeping your instrument in tune.
Keeping all the hardware tight will help reduce unwanted vibration and buzzing.
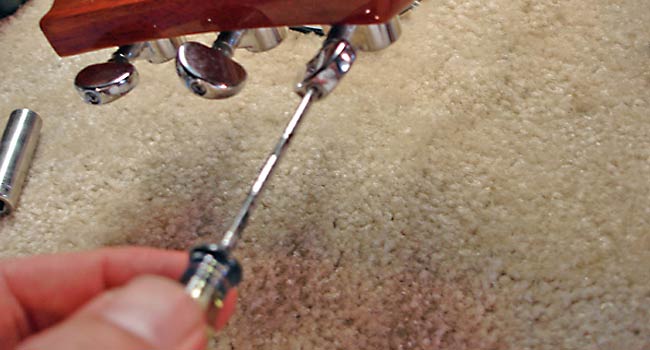
Your tuners should be on the tighter side, with a smooth-gliding operational feel. Don't forget to check the tuner's locking nut surrounding each tuner. A deep socket used by hand is great for tightening or removing tuner nuts. The deep socket is also useful for tightening loose volume pots, tone pots, and input jacks.
Use a deep socket to tighten the locking nut of the guitar tuner.
Never force any bolt or nut. The best practice is to tighten and loosen by hand and not with a wrench. This is usually enough leverage, and will help you feel what's going on. To remove volume and tone knobs, take a rag and wrap it underneath and around the knob. Twist the excess rag tight so that it firmly has a hold of the knob. Gently lift up, and then move the rag to the opposite side of the knob and repeat if necessary until the knob comes off.
For wood screws that have lost their grip and keep spinning, remove the screw and insert a toothpick into the hole. Cut the toothpick off at the top of the hole and leave the toothpick piece in the hole. Reinsert your screw and tighten. If it still spins in the hole, repeat the process until there is enough toothpick in the hole to keep the screw tight.
Thanks for taking the time to read this, and I hope that my tips and tricks will serve you and your instrument well, and help you avoid costly mistakes in the future. If you have any questions, leave them in the comments below!
Jimmy Cass is guitarist of Fire Blue Sun and founder and CEO of SRGuitars.com, an online music store specializing in new, used and vintage instruments.